Initialising and Allocating a Drive

On your desktop, you should have an icon for ‘This PC’. 

Right Click on this icon and select ‘Manage’ from the drop down box that appears.

If you do not have the ‘This PC’ icon, you can search for ‘Disk Management’ in your bottom taskbar.

A pop up window will appear titled ‘Computer Management’

Select ‘Disk Management’ under the ‘Storage’ category on the left side menu

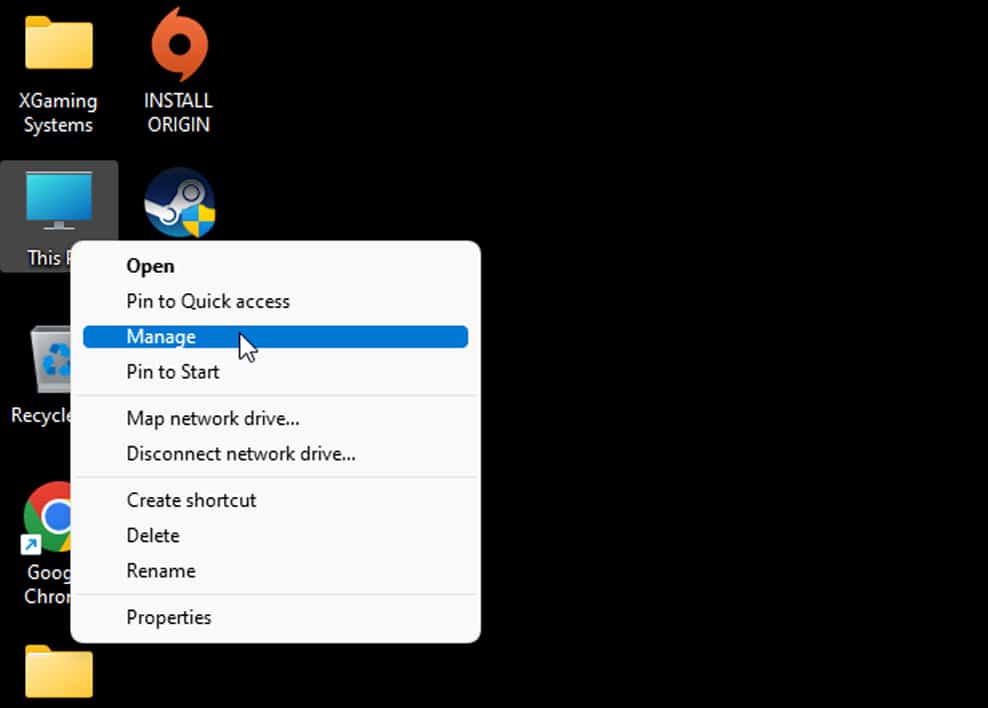
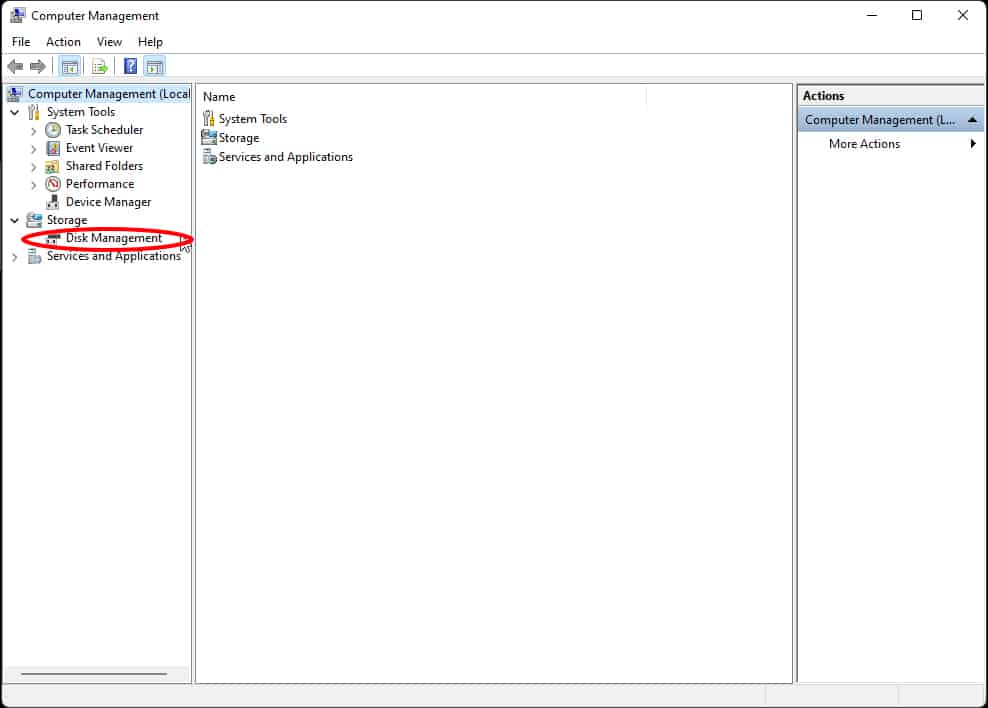
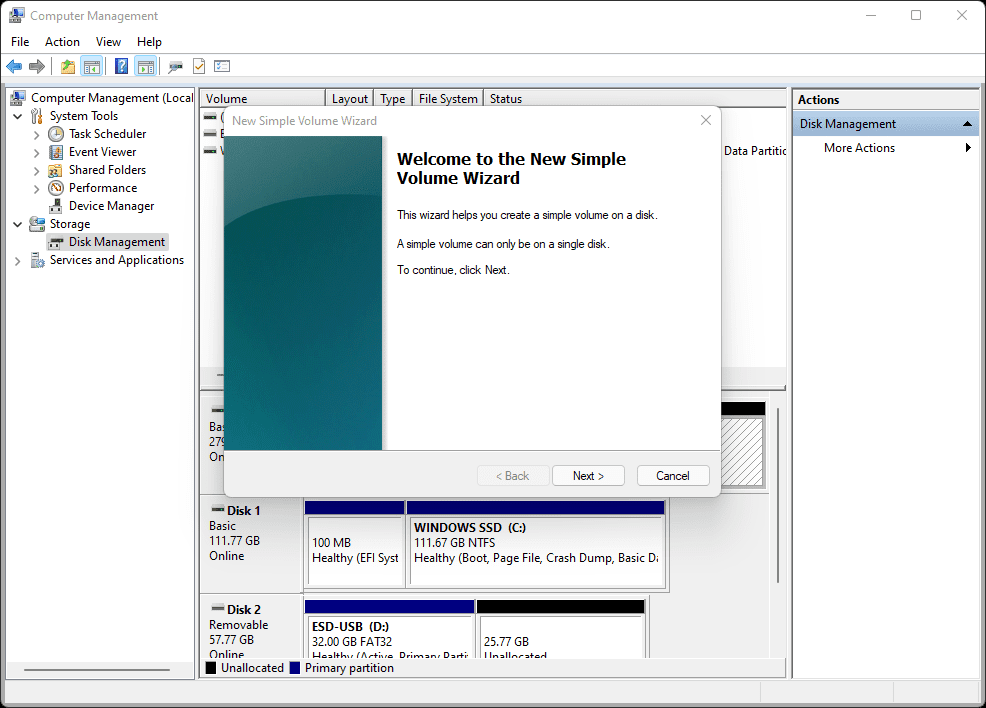
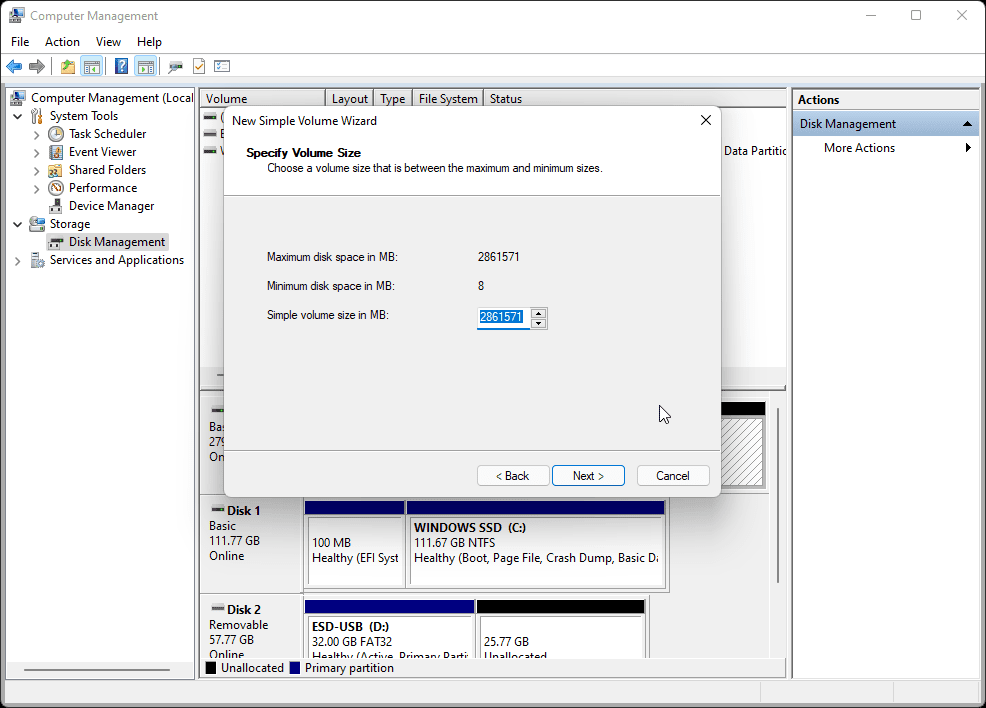
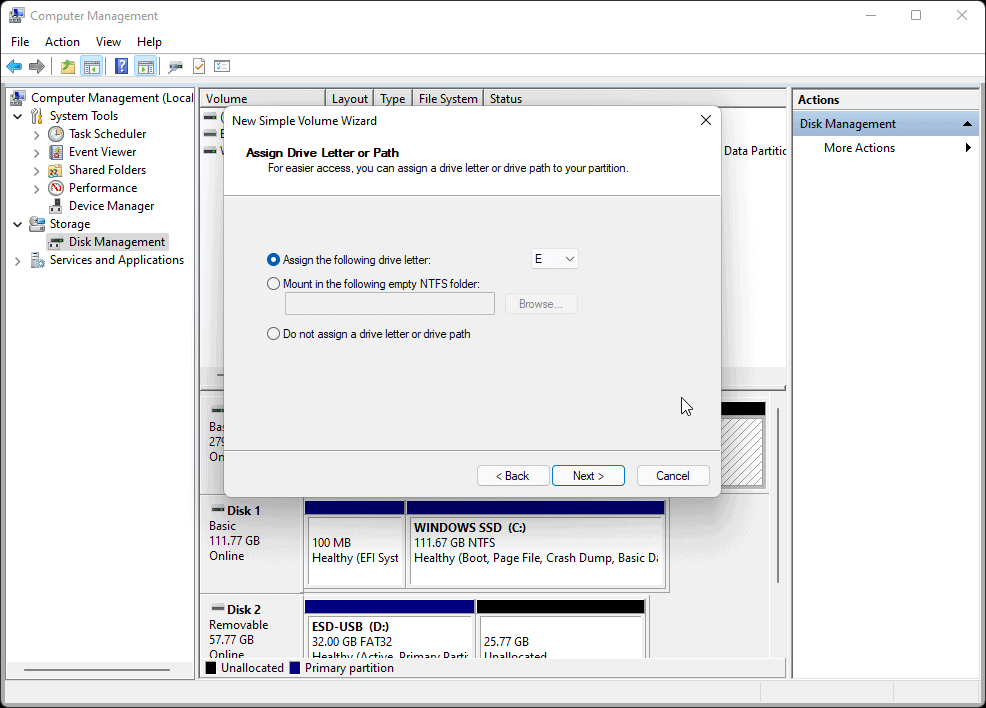
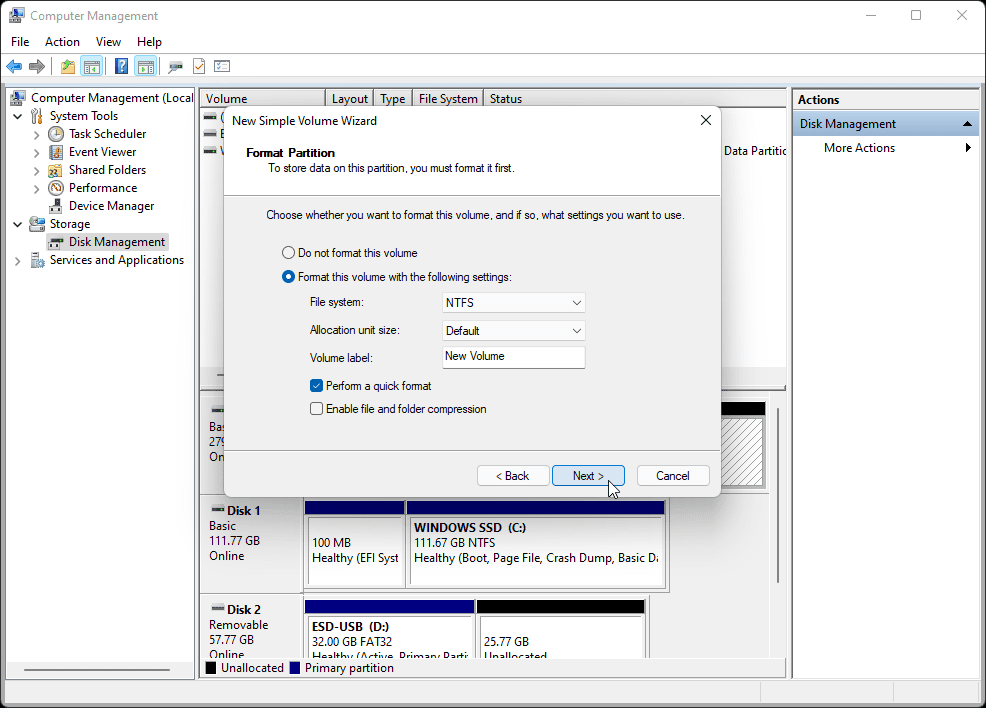
The Disk Management options will appear. This allows you to view you hard drives available in your system. 

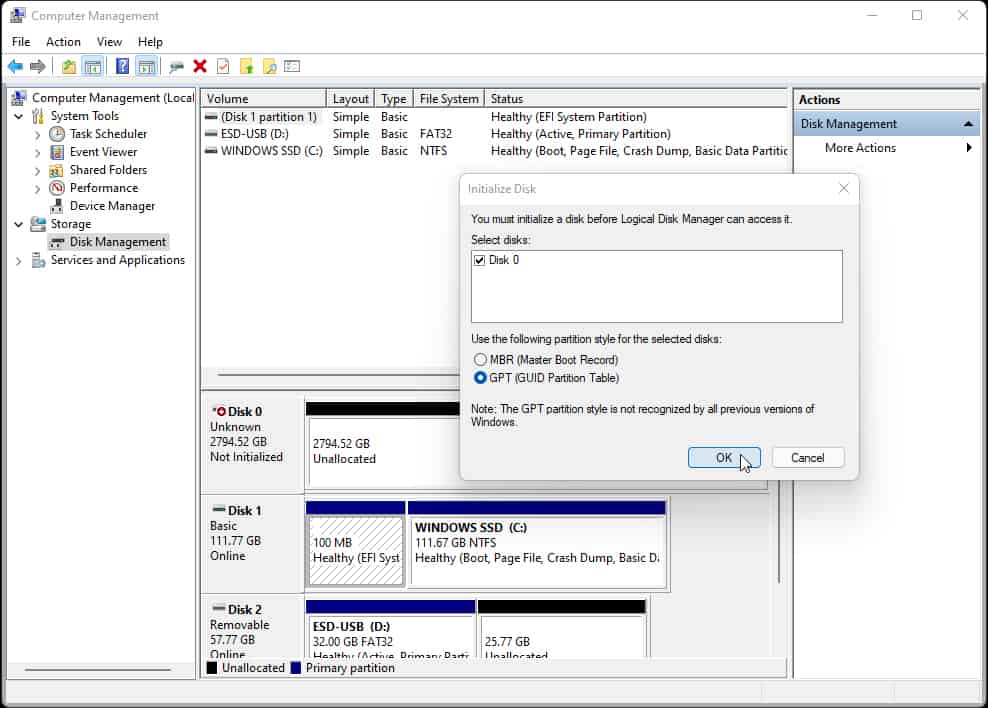
If you drive has not be initialised, a pop up window will appear. Note that the uninitialised drive registers as ‘Unknown’

Ensure that GPT(GUID Partition Table) is selected. 

Click OK

This step allows the computer to initialise and access the drive so it can be recognised for use. 

This will change the drive status to ‘Online’ from ‘Unknown’ however we now need to partition and allocate the drive. 

Right click on the drive to be partitioned and select ‘New Simple Volume…’ from the drop down list. 

Another pop up window will appear to guide you through the process of partitioning the drive.

Select ‘Next>’

Specify the volume size

By default, the maximum size is prefilled into the volume size box. 

Select ‘Next>’

Asssign Drive Letter or Path

This allows you to assign the drive letter that will be shown when browsing your folders and documents. 

You can select any letter, as long as it is not in use by another drive.

Once you have chosen your desired letter, select ‘Next>’

Format Partition

Ensure that the ‘Format this volume’ option is selected

The preallocated boxes of ‘File system’ and ‘Allocation Unit Size’ do not need to be edited. 

To name your drive, insert your desired name into the ‘Volume Label’ text box, else the default name of ‘New Volume’ will be used. 

Select ‘Next>’

Format Partition

Ensure that all information is correct.

Select ‘Finish’

Your drive may take a few moment to partition. 

Once finished, your drive will be registered in Disk Management and will be available for access to browse its contents in your folder, or to install games and software. 

How to Expand your Drives

If you have a drive in your computer that isn’t fully allocated it can be easily expanded. In Disk Management, it will show any unallocated space on drives in your system.

Right click on the drive that you wish to expand.

A drop down box will appear. Select ‘Extend Volume…’

A new window will appear to guide you through the process to extend your drive.

Select ‘Next>’

By default, the Extend Volume Wizard will automatically select the remaining unallocated space on the drive.

You can adjust this if needed.

Select ‘Next>’

Extend Partition Ensure that all information is correct. Select ‘Finish’
Your drive may take a moment to extend. Once completed, the drive will show that the space is fully allocated.